How to test the Oculyze BB Web App
So now you’re ready to test our BB Web App. Let’s take you through what you can do.
You’ve now received an email with these 3 very important things:
- The link to the login page: https://webapp.oculyze.net/bb/login
- Your user name and password.
- The link to some sample images you can use to do the tests: https://cloud.oculyze.de/s/n4G2fPLmqRHR89q
Next step: access your account by simply going to the login page and entering the name and password you’ve received via email.
Once you do, you’ll end up on the dashboard page.
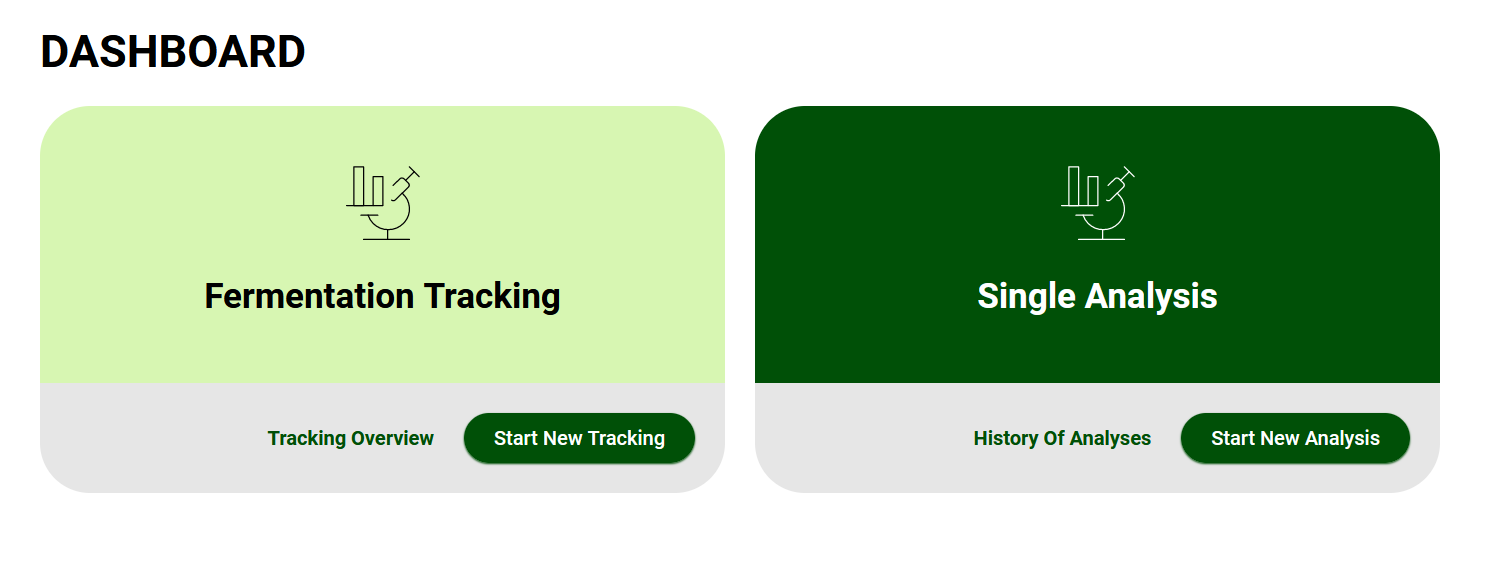
From here on there are two main things you can do*:
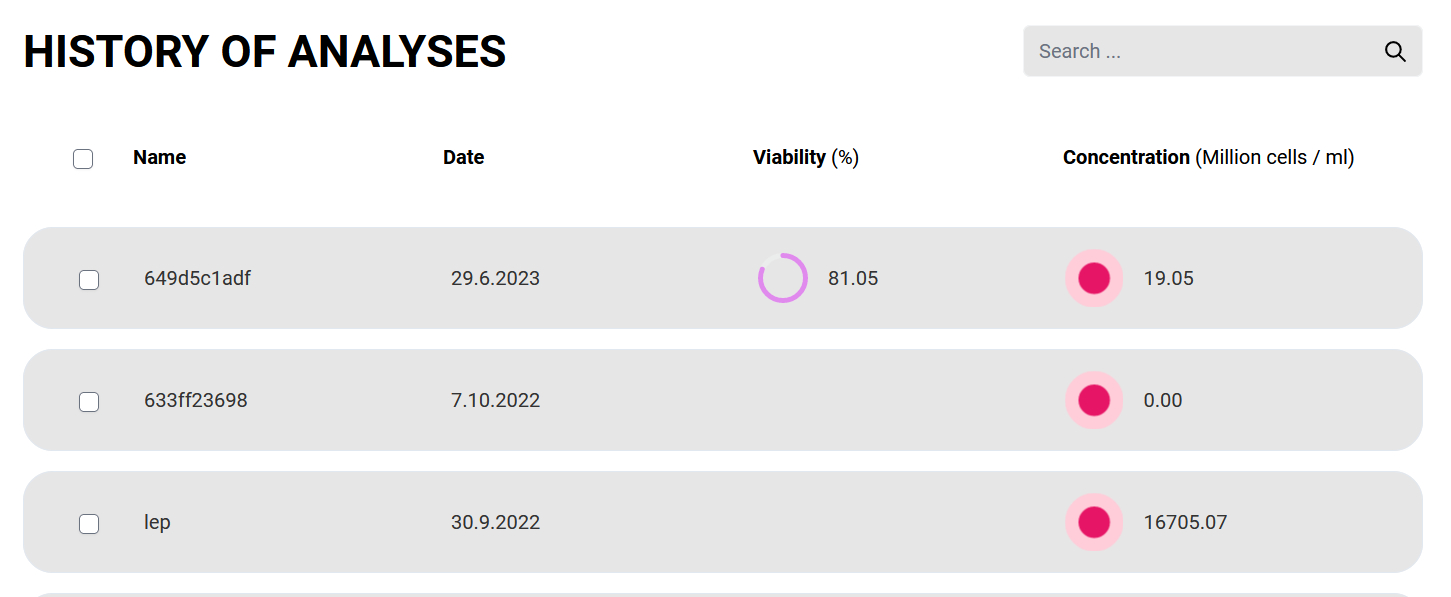
- Check out the sample analyses we’ve already uploaded (see “History of Analyses”)
- Add a new analysis (“Start New Analysis”)
*you can also check the Fermentation Tracking feature, but that really becomes useful when you start doing more analyses for a certain fermentation (or batch).
Our recommendation is that you start with the first, by clicking the “History of Analyses” button, to check out the sample analyses we’ve already uploaded and get familiarized with what you should expect. Once you click on “History of Analyses”, you’ll end up on a page with an overview of all the sample analyses we’ve uploaded:
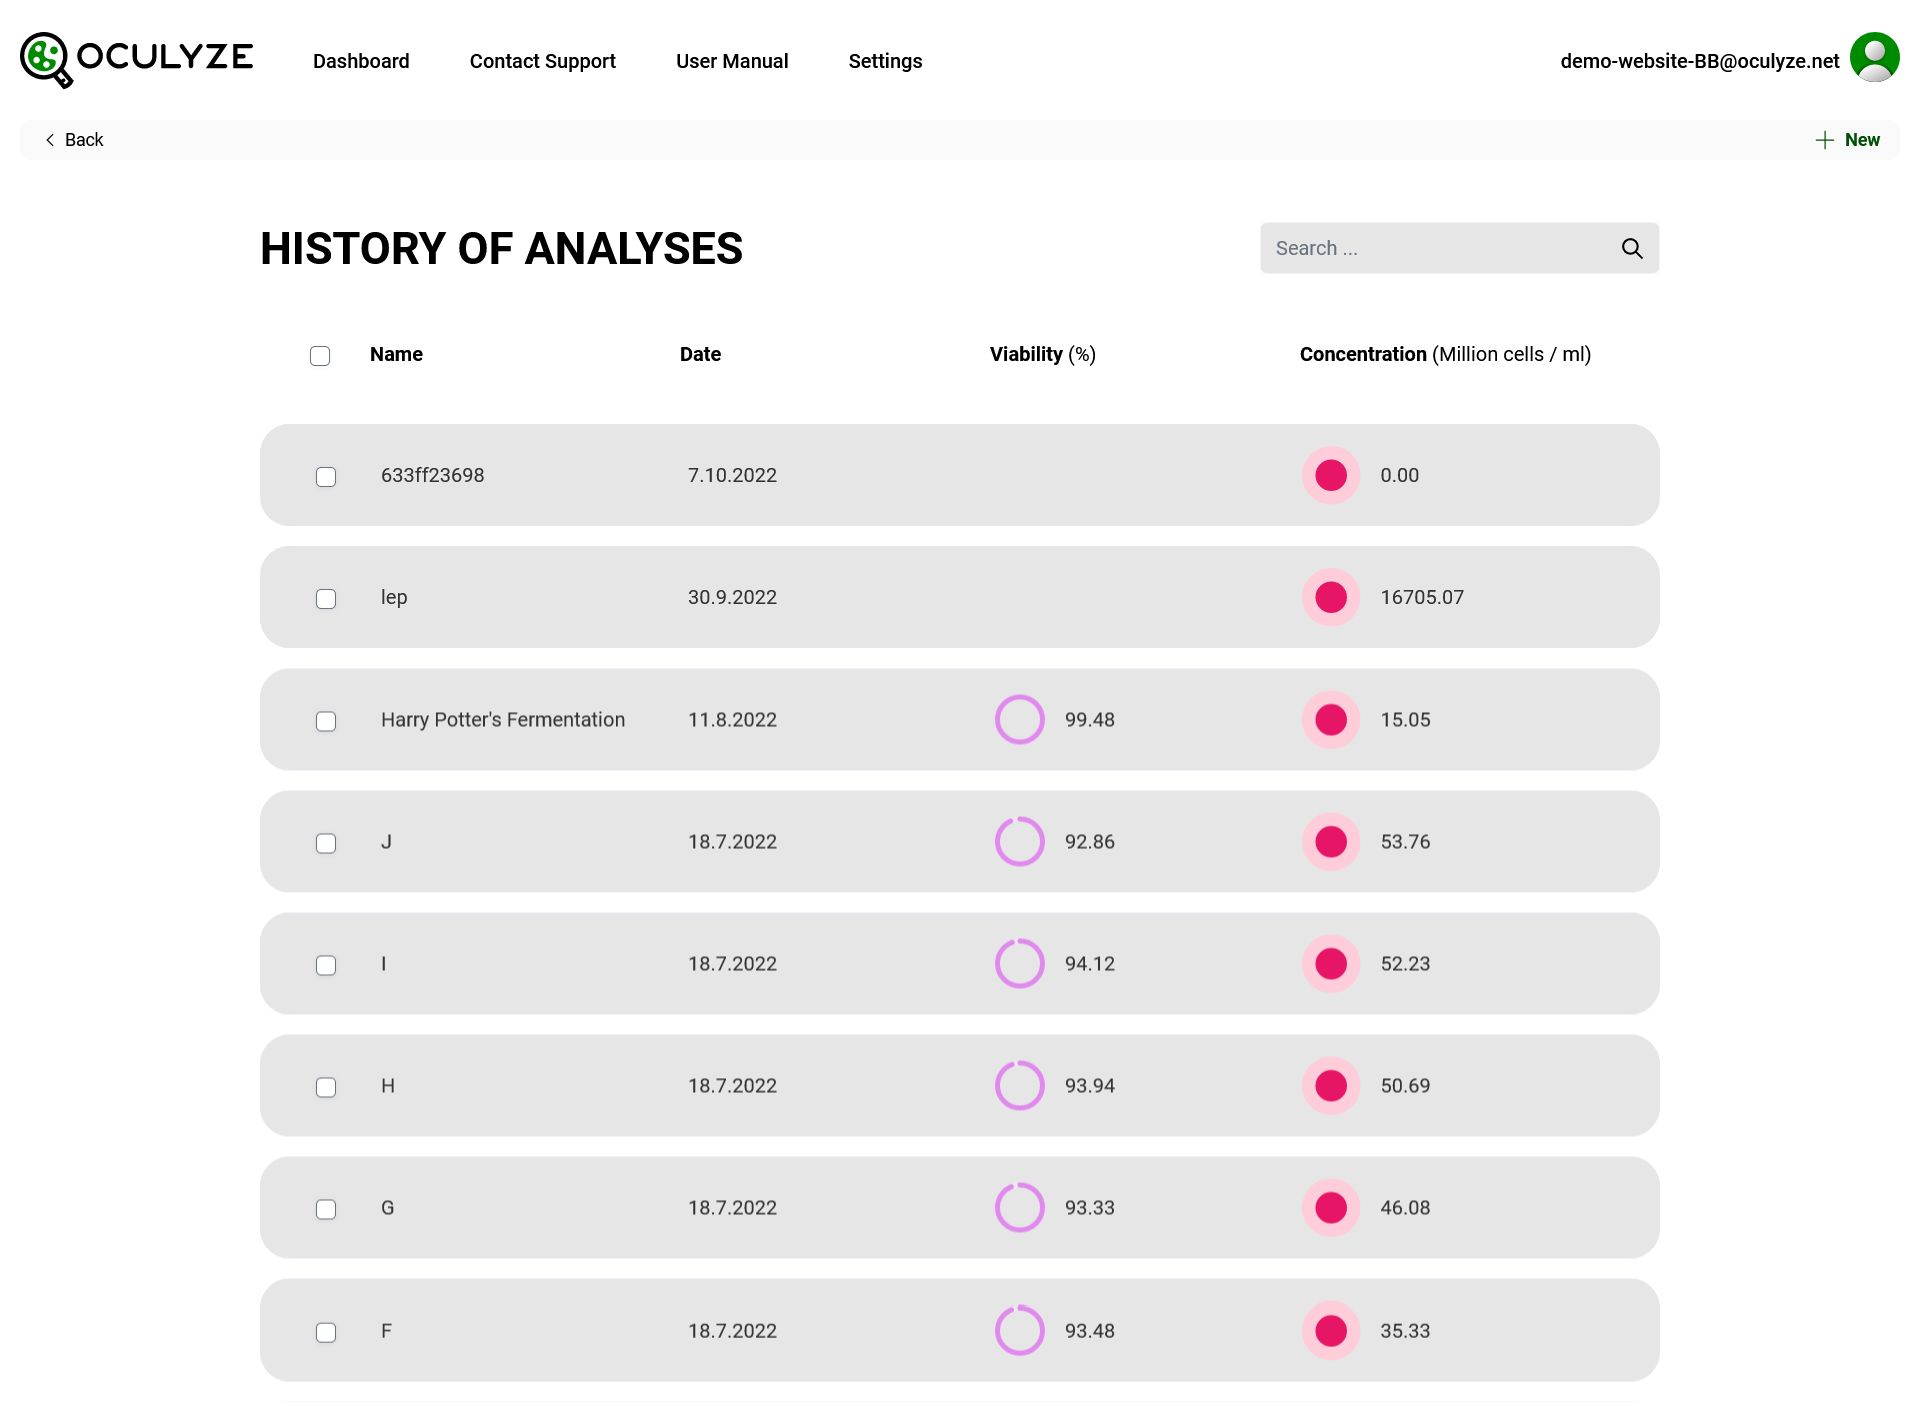
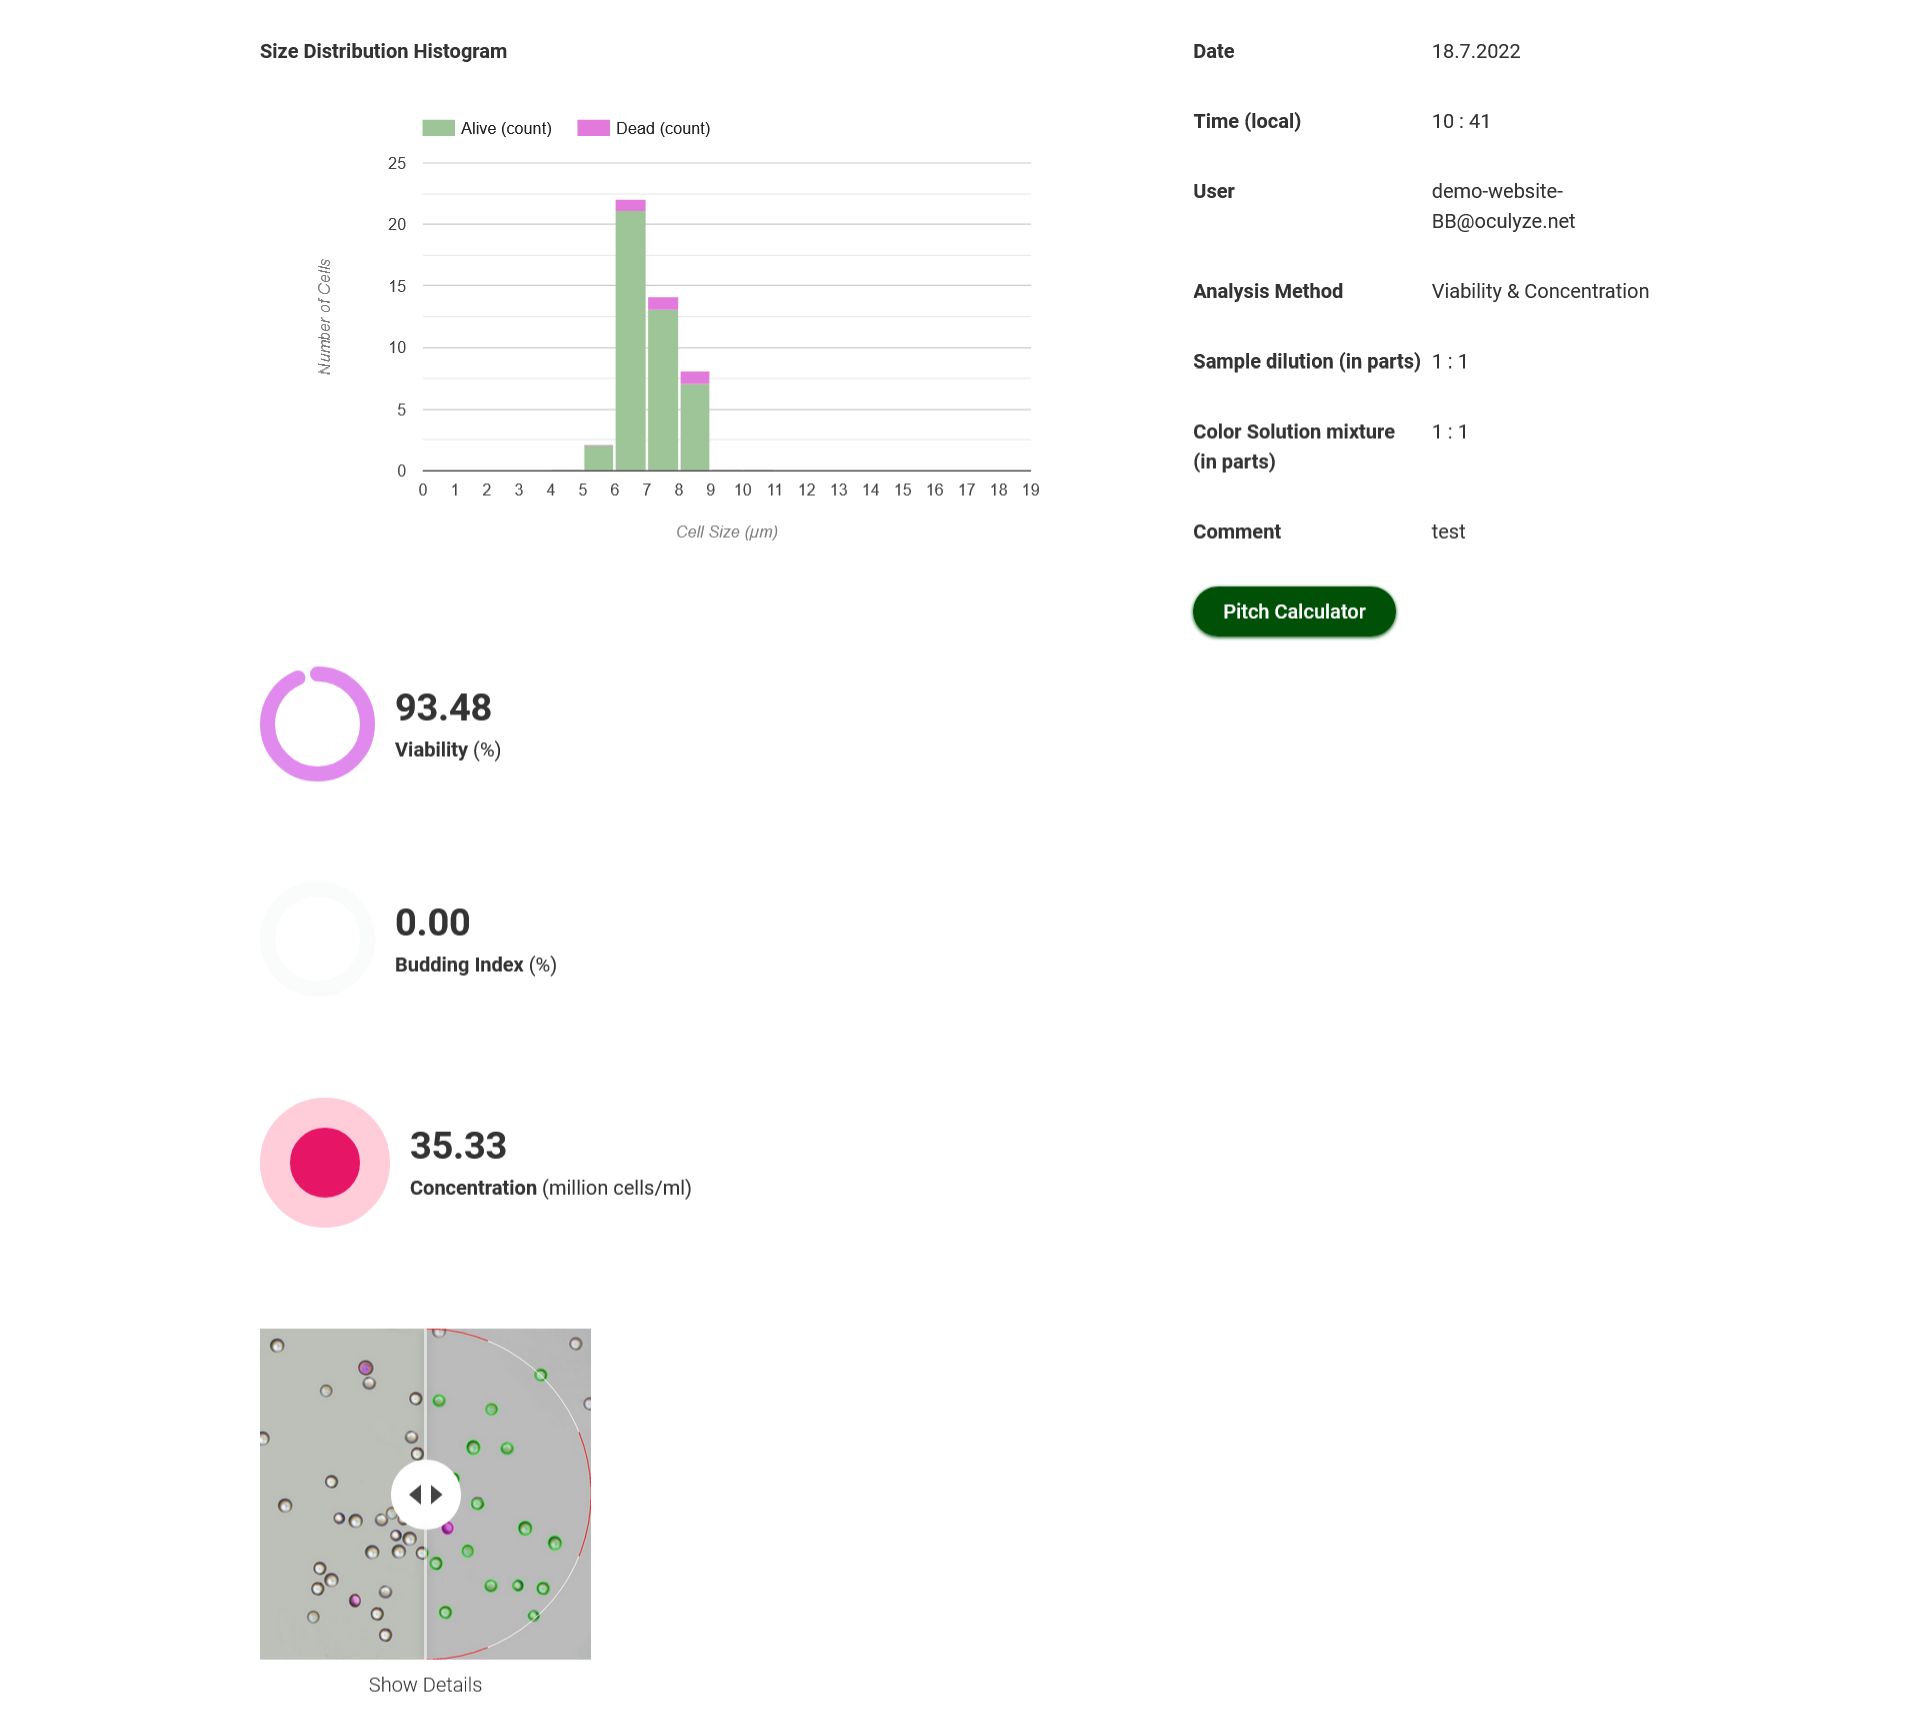
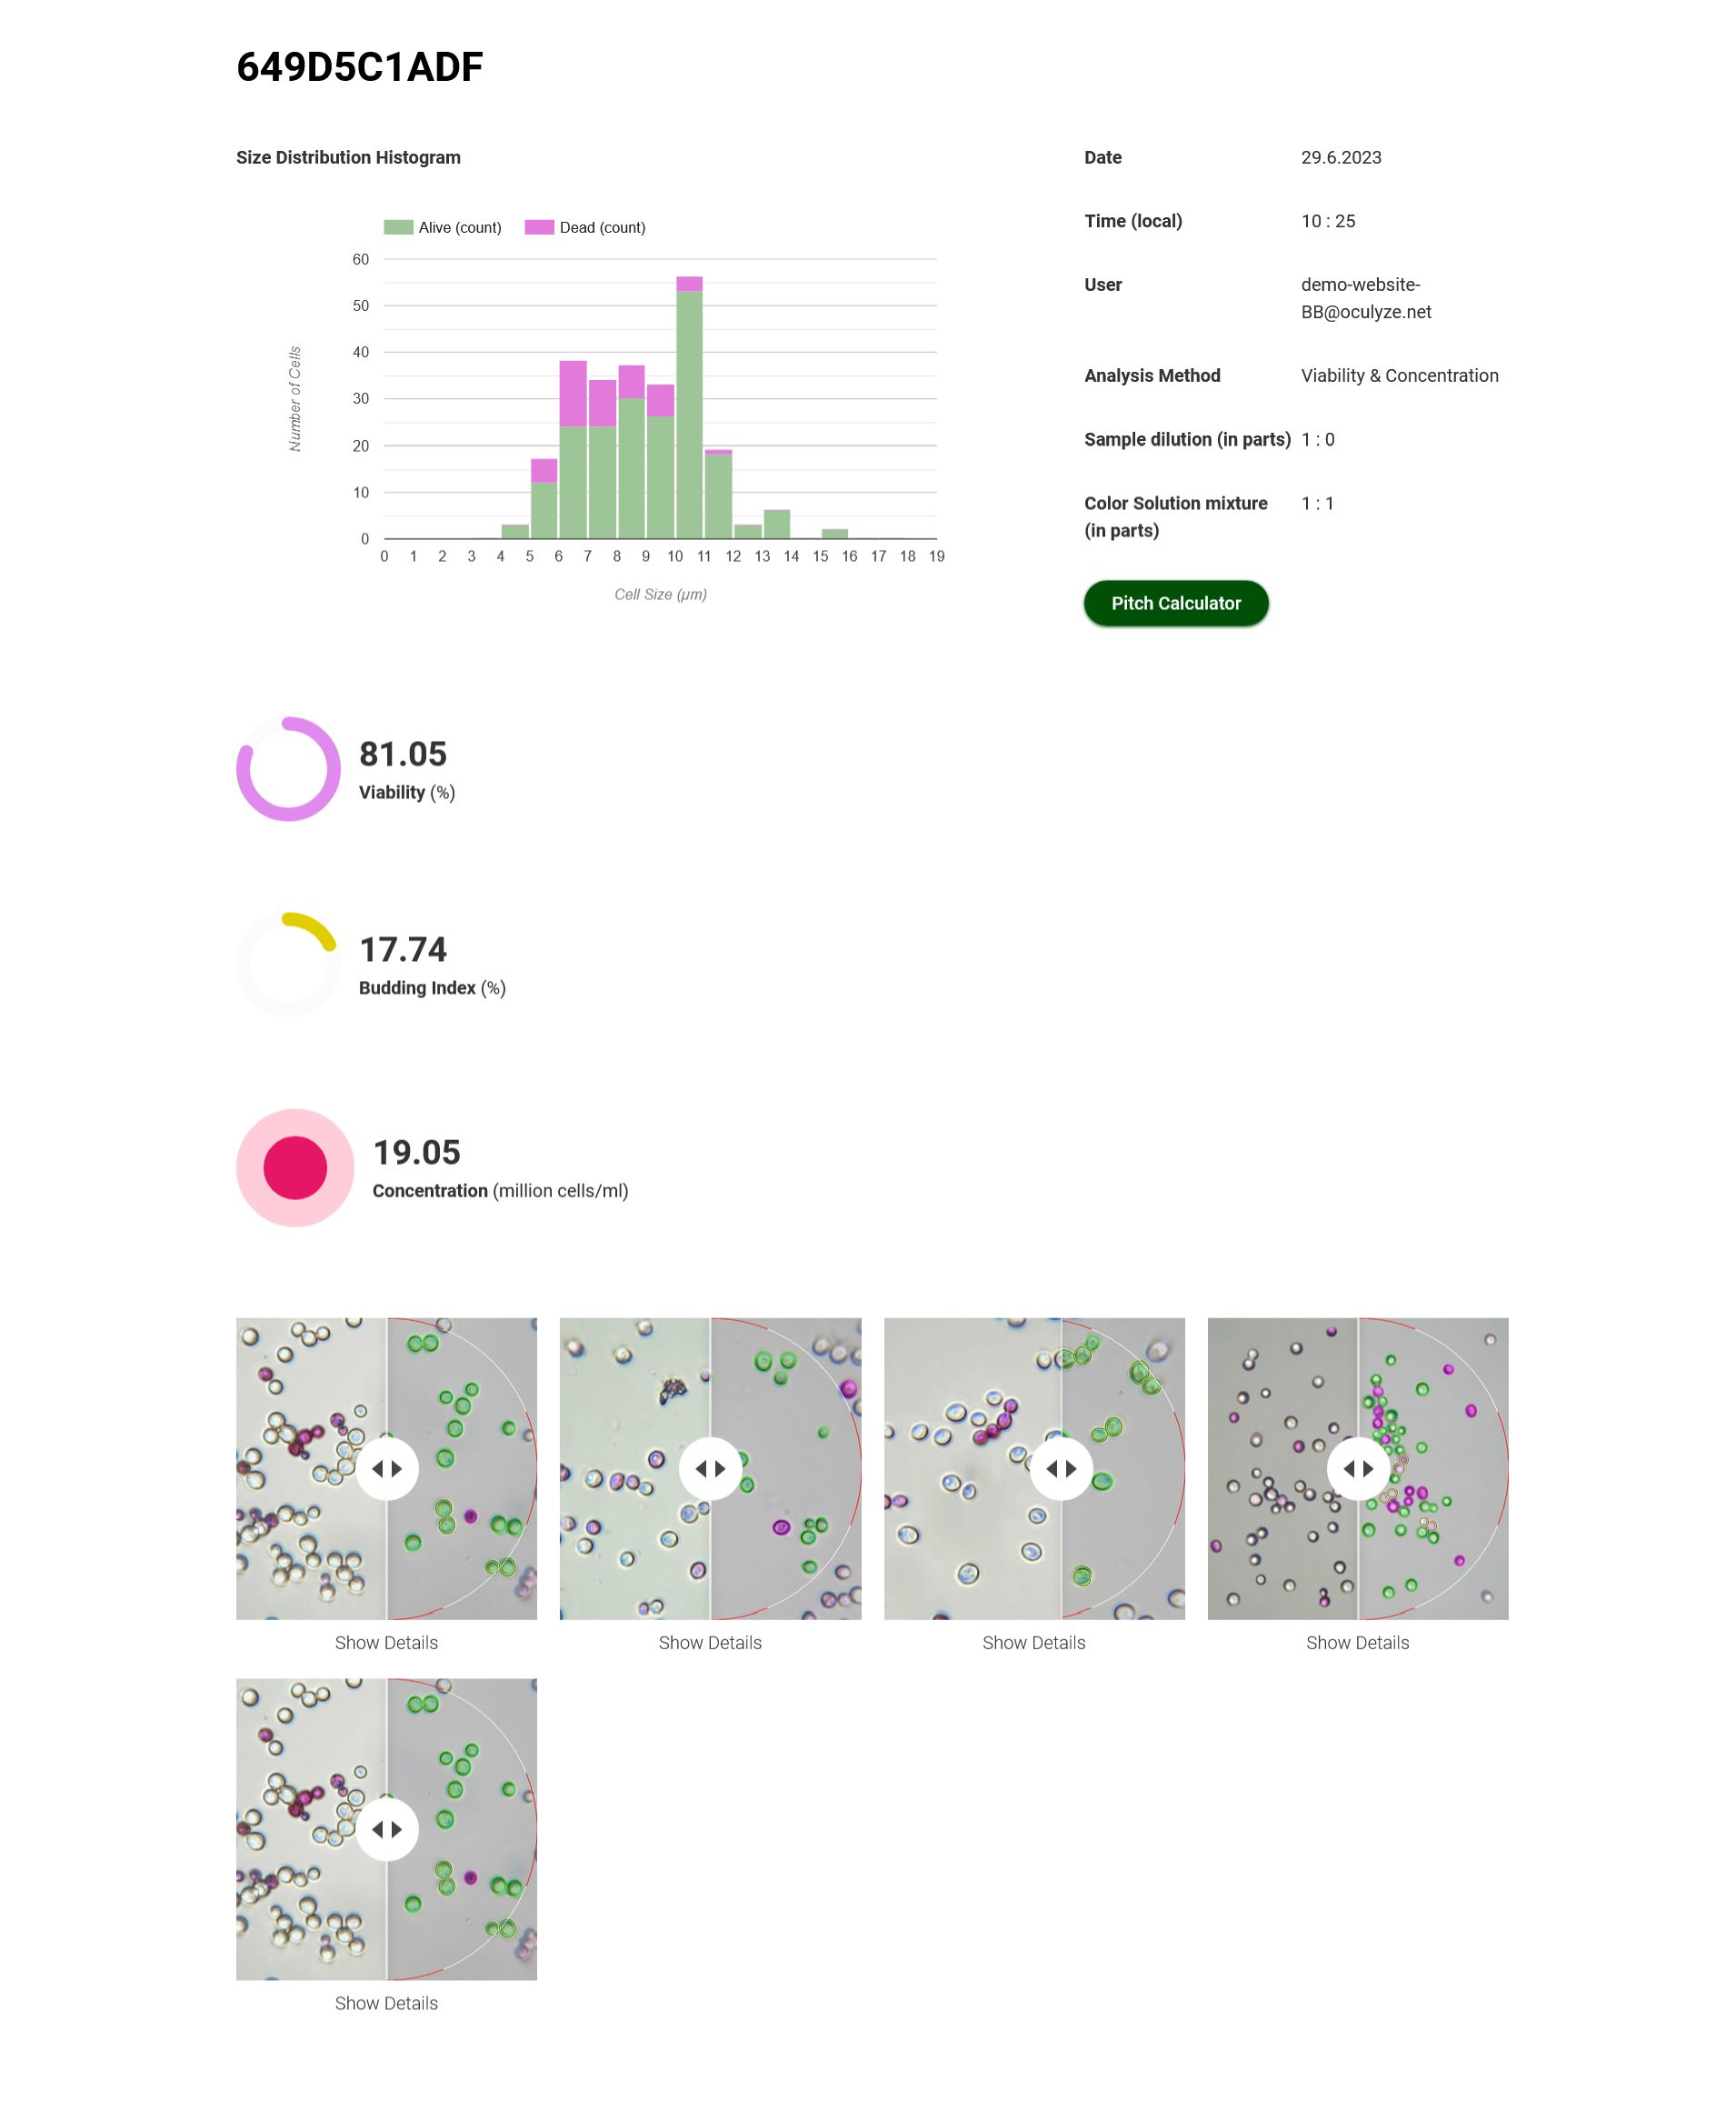
Click on any of them and browse through the results. Play with the graph, check out the details for the single measurements at the bottom (the images) and just learn your way around the data.
Once you’ve done that, you can move on to the next step, which is to add an analysis by yourself. For that either click on the “+ New” from the History of Analyses page or just go back to the dashboard and click on “Start New Analysis.”
Now you have the option to choose the type of measurement you wish to do: “Viability and concentration” or “Only concentration.”
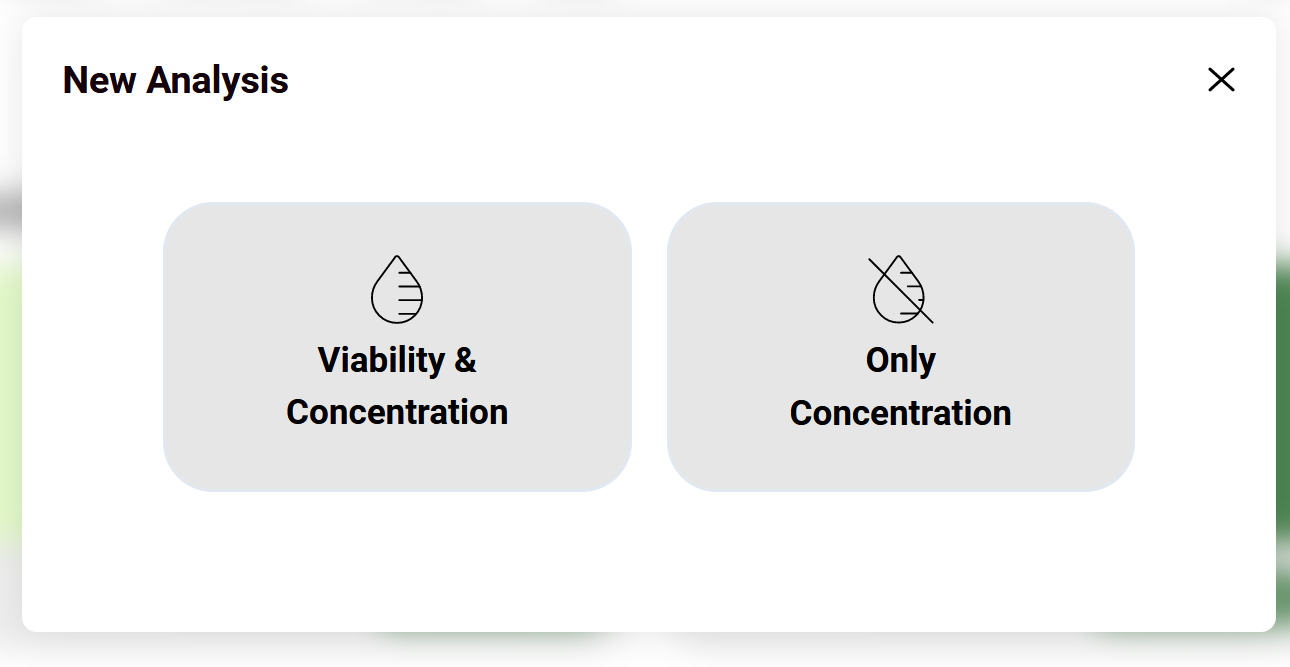
Choose the one you want and click on it. At this point, your browser will require permission to connect to our microscope or camera kit. You can block it and ignore the error message.
For testing purposes all you need to do is to upload your own images* or upload some images from the ones we’ve shared with you (feel free to download any of them on your device): https://cloud.oculyze.de/s/n4G2fPLmqRHR89q
To upload the images, click on “Choose an Image from the Device.”
*The default number of images you have to upload is 5. But in Settings (click on the profile icon on the upper right side of the screen) you can change that and lower it down to a minimum of 2.
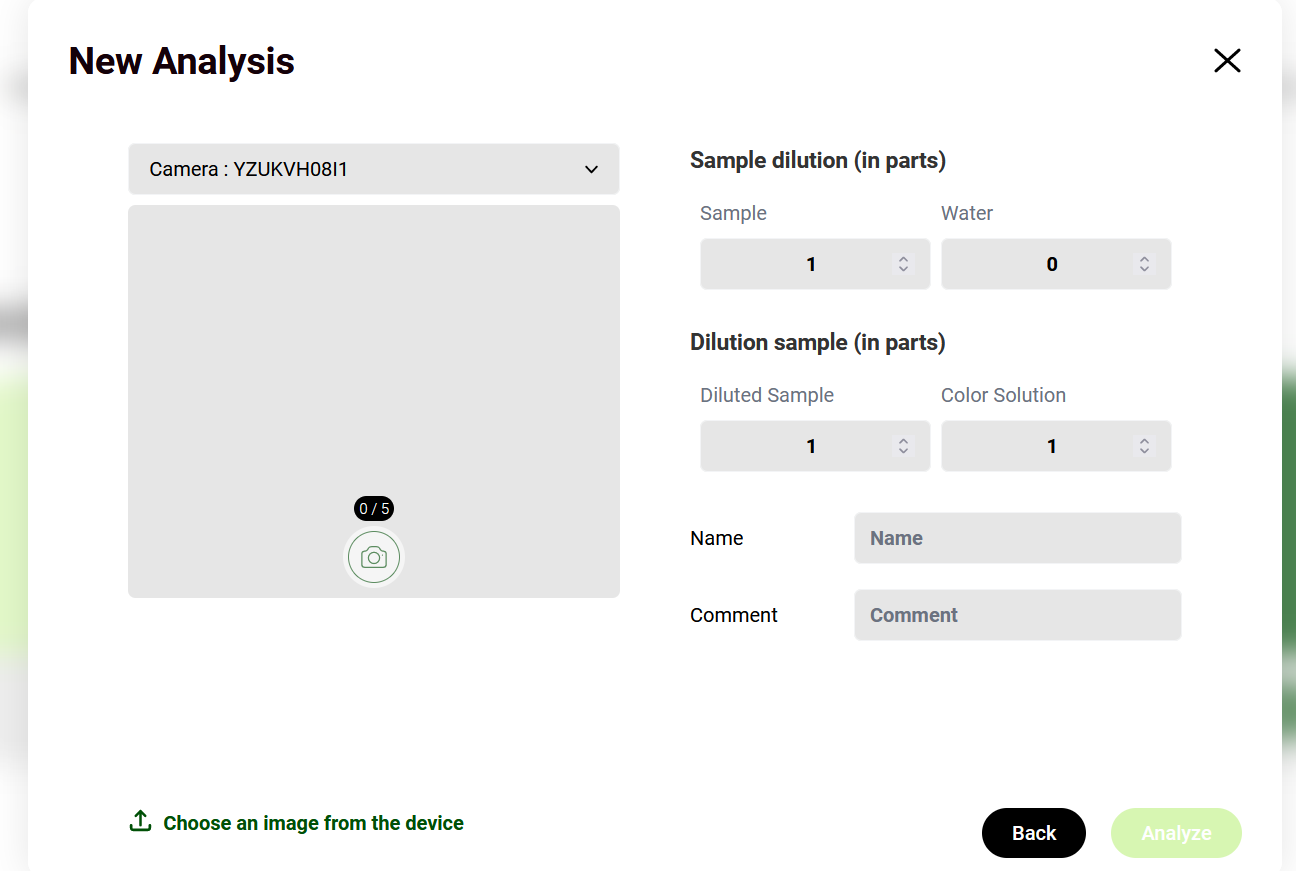
Once you’ve uploaded the images, you can create a new measurement by clicking on the “Analyze” button. You can now see the details of the measurement you’ve created:
Go back to the Dashboard -> History of Analyses and you will now see the analysis you’ve created in the list:
You can, of course, also browse through all the settings, add more analyses, adjust your input data, and if you have any questions feel free to contact us by clicking the support button or by dropping an email at [email protected]


