How to Stain Yeast Cells
Figuring out how to stain yeast cells is actually a very simple process. Most important in that process is getting the equipment necessary and gaining an understanding of what is happening during the staining.
Yeast is a brewer’s best friend, so it is not only helpful, but it is also truly essential to have at least a surface comprehension of how this tiny but mighty living organism functions during fermentation.
Yeast
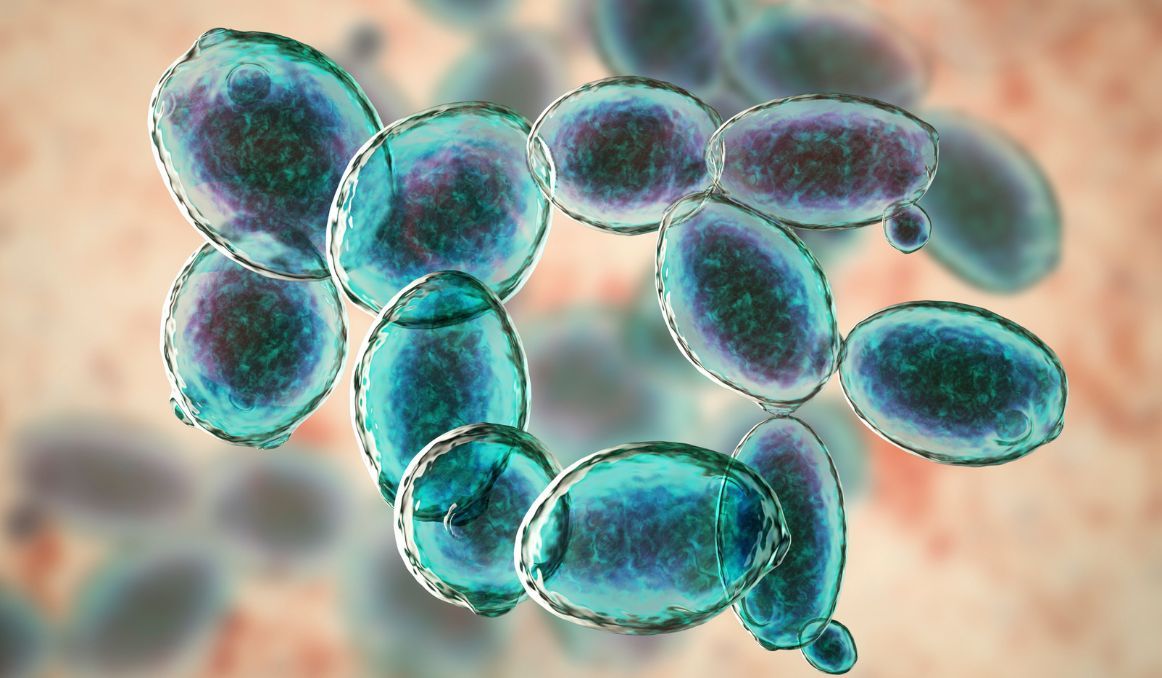
Yeast is a single celled, eukaryotic organism as old as life on earth.
It is a member of the fungus family, which was indeed the very first living organism on the planet.
It is microscopic, invisible to the naked eye until it clumps together to ferment, at which point it usually looks like a lumpy, wet, white mass.
In its active state, yeast is constantly in search of sugar, its only food aside from the dead yeast cells left behind for filler.
Yeast can reproduce sexually or asexually and can thrive both with and without oxygen, able to perform its important function of fermentation aerobically or anaerobically.
The only real killers of yeast are extreme heat (yeast cannot survive at temperatures of 120 degrees Fahrenheit and above), alcohol, and some natural oils like coconut and seed oils.
Beyond that, yeast will continue on its mission to find sugars and convert them to alcohol, carbon dioxide, and hundreds of micronutrients.
As a result, humans have discovered the wonders of wines, ciders, beers, and breads, among several other fermented foods and drinks.
Live and Active Yeast
For millennia, we never had to worry about whether yeast was alive and active.
We simply crushed our grapes, ground and soaked our grains, or kneaded our bread, and then let nature take its course.
Because yeast is always present – in the air, on surfaces, on our skin, and even in our bodies – it would be only a matter of time, maybe 24 hours, before fermentation started.
We would see the bubbling and frothing and know that we would soon have wine, beer, or bread.
Today, however, thanks to the rise of industrialization and commercialization, yeast has become a product that can often arrive either dead or mostly dead.
Once scientist Louis Pasteur figured out the role of yeast in fermentation and let the public know exactly what was going on, it was not long before an entire industry rose around the production, marketing, and sale of yeast.
Now, companies harvest and package yeast and ship it either dried or liquid.
In its dry state, yeast can seem just like a grainy powder with no power to do much.
That is because dried yeast, much like frozen yeast, is lying dormant, waiting to be activated.
To activate dried yeast, all you need to do is add it to a small cup of warm water with a bit of sugar.
Within minutes, you will see bubbling activity as the yeast is awoken and agitated into action.
Liquid yeast arrives (how else?) in liquid state and ready to be used within a few weeks.
In both cases, the manufacturer will include a percentage guarantee, committing to you that a certain amount of the yeast in each batch will be alive and active, as well as an expiration date past which their guarantee is no longer good.
Yeast and a Consistent Brew
However, those companies do not always make good on their promises, and it is critical in brewing to know the truth of those percentages.
You see, yeast does not just ferment; it also contributes a tremendous amount to the flavor and aroma profile of your brew.
Off flavors, fruity scents, floral fragrances, even texture, are all natural byproducts of yeast, and those flavors and aromas can be toyed with and perfected if you know your yeast well.
To that end, brewers need to be able to pitch yeast knowing full well the exact percentage of live and active yeast they have. They also need to be able to measure those percentages during and after fermentation.
By keeping an ongoing eye on your yeast, you can perfect your craft by establishing expectations and a baseline.
So, while most brewers say you can technically pitch yeast as low as 70% live and active, you may want to aim higher for 90% or even 95%.
Those percentages will greatly affect your rate of fermentation as well as flavor and aroma.
For each batch you make, you can make note of your percentages, your pitch rates, and the end results, which will help you more accurately predict how that strain of yeast will perform.
If you love that batch as you perfect it, you can then crop and repitch your yeast, creating a steady yeast supply, so you never have to rely on a manufacturer who may under deliver.
What stain to use: Methylene Blue vs Methylene Violet
About the importance of yeast cell viability in brewing you can read in more detail here.
Getting back to the focus of the article, yeast staining, it’s important to mention that there are several types of staining solutions that you can use for yeast, but the most commonly used are Methylene blue and Methylene violet.
And while methylene blue tends to be the most popular staining solution amongst brewers, according to a scientific article published in the Journal of the American Society of Brewing Chemists which investigated the sensitivity and response of each method by using ale, lager and cider yeasts in various physiological states, “it is suggested that methylene violet staining may provide an effective alternative to the more traditional methylene blue stains.”
So why is methylene violet a better option?
Well, for one, the authors note that while staining with methylene blue represented accurately cell viabilities in healthy or starved and stressed yeast, it did not perform as well in nonviable populations, “resulting in drastic overestimations (up to 92%) of percent viability.” This was partly caused by the fact that the dye formed different intensities of coloration, from pale to dark blue in dead and dying cells, making it very difficult for the operator to differentiate between viable and nonviable cells.
In contrast, methylene violet dye allowed for an easy differentiation between living, stressed and dead cells, making it a less subjective and more accurate method.
So, to sum it up, methylene violet seems to be a better alternative to methylene blue, as it leaves you with a binary choice: clear cells are alive, while dead cells remain colored.
Additionally, and this is an important point as well, methylene blue is considered to have a higher toxicity.
For more details, check out the safety sheets for both:
How to Stain Yeast Cells
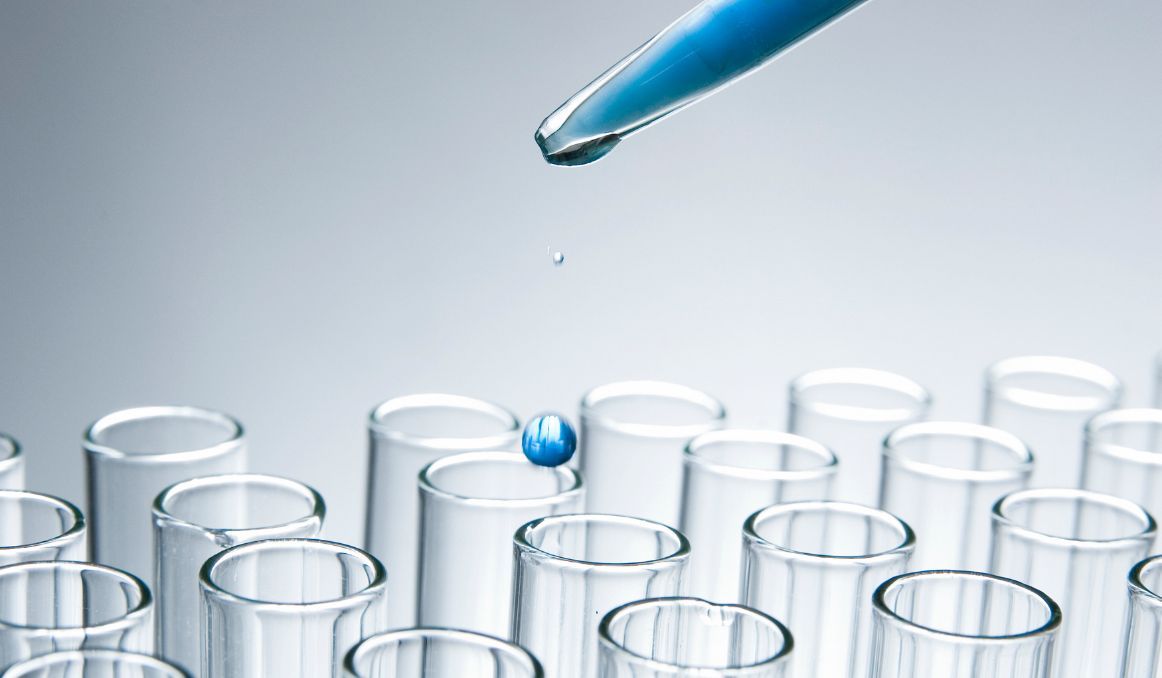
The best way to calculate your percentages of viability (live yeast in a batch), is to have a microscope with at least 400x magnification, counting chambers, Pasteur pipettes, and either methylene blue or violet dye.
You will simply collect a small sample of yeast, dilute it with water so that you end up with a total of 1 ml in your sample tube, add 1 ml of methylene blue or violet to the mixture, and then add the mixture to your counting chamber.
Under a microscope, all of the dead yeast cells will show up the same (roughly) color as the dye. Live and active yeast cells have the ability to metabolize out the dye, so they will maintain their whitish color.
Then, you can calculate your percentages based on the number of dead & alive cells.
For more detailed info, check out this detailed article (includes a video + links to the recipes for Alkaline Methylene Blue 0.1% and Alkaline Methylene Violet 0.1%) on how to stain your yeast: Staining the Sample for Viability Test
Last but not least, keep in mind that no matter which type of dye you’re using to stain your yeast, as long as you’re doing the counts manually, the viability assessment will always depend on the subjectivity of judging a color. Also, if you have to do yeast cell counts or assess your yeast’s viability on a regular basis, it can become costly, as it will translate into hours of human labor / month.
That being said, the Oculyze Automated Cell Counter is 10 times faster than manual counting, it easily deals with budding cells, it can do the yeast cell concentration & viability in one go and it comes with additional features such as the Pitch Rate Calculator and the Fermentation Tracking.
So if you’re interested in finding out how you can use our technology to control fermentation and monitor your yeast, save work hours and improve the cost-efficiency of your business, drop us a line at [email protected] or check out our product pages:
- Oculyze BB 2.0 (Better Brewing) Yeast Cell Counter App + Hardware
- Oculyze FW (Fermentation Wine) Yeast Cell Counter App + Hardware
Also, you can now get access to a fully functional demo account to test our Web App. Completely free of charge and with no commitment to purchase.
Sources:


