How to Propagate Yeast for Brewing
More and more people around the globe are coming to terms with something we have lost over the past hundred years – self-sufficiency.
As classic examples of the heartbeat of a community, brewers learning how to propagate yeast for brewing are paving the way toward a return to our ability to care for ourselves and refuse to be victims of factors like global inflation and price gouging.
Industrialization and Capitalism
Industrialization and capitalism, both a blessing and a curse.
Industrialization, the rise of cities, factories, and work for hire, gave us the ability to rise up from the lower classes, get jobs, and have the opportunities to become captains of industry.
No one can deny the many rags to riches stories across the western world, and they are largely due to industrialization,
Same goes for capitalism.
Capitalism is, so far, the only economic system that allows us to work in one area, for one thing, and earn a form of currency that allows us to then buy things we need and pay for our cost of living in that same agreed upon currency.
It is a brilliant system with obvious downfalls.
One of the downfalls of both industrialization and capitalism occurs when those systems convince people that they must rely on the systems to care for them and those same systems, being non-human systems after all, do not care for the humans who are now dependent on them.
Which leads us to where we are today, in an inflation economy with prices rising.
For the everyday brewer, this rise in prices hurts particularly because you don’t want to turn around the price gouging your loyal customers, the ones you have fought so hard to win.
What can you do?
You can find ways to save money on your end.
Propagating yeast is an excellent start.
Yeast Propagation
Yeast propagation goes back as far as humans have been interacting with yeast.
Think about it, those making wine, the first fermented beverage that we know of, had to figure out pretty quickly how to make consistent batches of wine, reuse the yeast from their great batches, and then help that yeast grow.
And that’s all yeast propagation is, really, growing more yeast from the batch you have.
Early brewers learned to do this to provide their loyal customers with a consistent, reliable barrel of beer every single time.
Hey, even early travelers and immigrants would carry their sourdough starter on their backs, growing their yeast as they went to ensure they had a good loaf of bread whenever they settled down to make camp.
The most important part of yeast propagation is to multiply yeast cells through your yeast starter so your yeast will be vital and viable with each batch.
Not only can you multiply yeast, but you can ultimately do it so well that you may never need to buy outside your brewery again.
Yeast Propagation System
Choose Your Yeast Wisely
The first, and most critical, step in yeast propagation is to ensure you have a batch of yeast you love.
If it made you a great batch of beer that fermented well and came out without a hitch, that’s the yeast you want to crop.
Crop Your Yeast
Next, you’ll want to crop your yeast.
We outline the exact steps for cropping yeast in a previous article, and we outline the timeline for cropping yeast in still another.
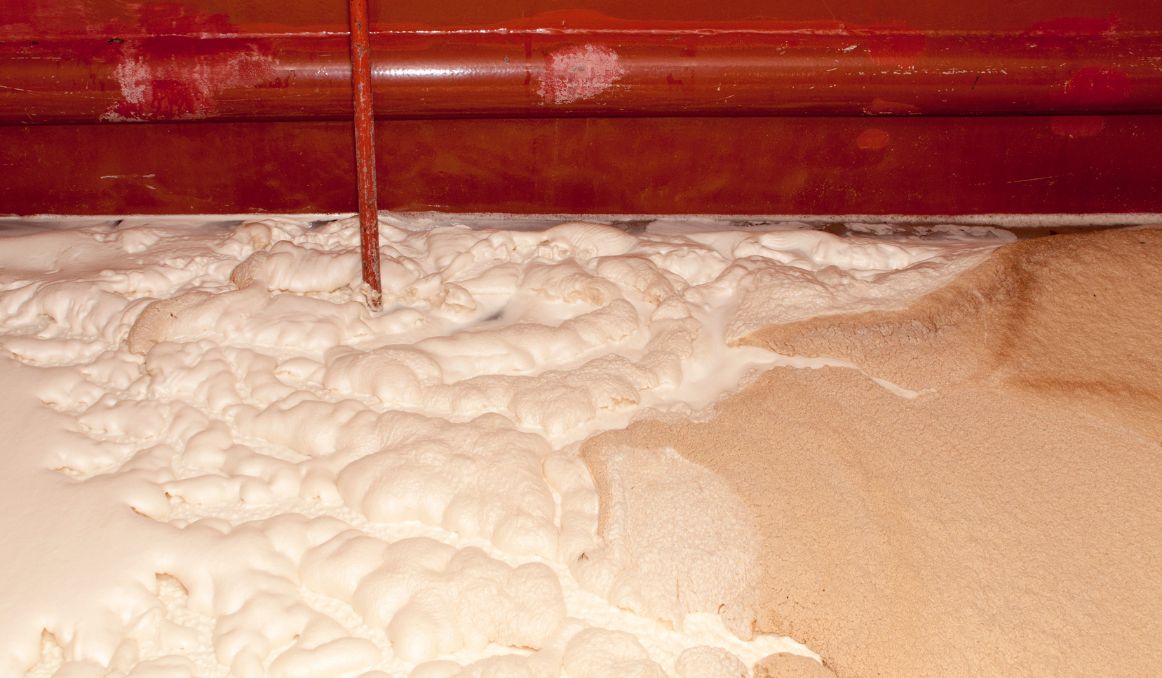
But basically, your best bet is to ensure you ferment in a conical fermentation tank that will collect your trub, the non-yeast sediment, and your slurry, the yeast and beer mixture, after you’ve racked your beer out of the vessel.
Then, you’ll release the bottom of the sediment, which is your trub, and crop your yeast from the center, where you yeast should be at its whitest.
You can then utilize the proper equipment to do a yeast cell count and ensure your yeast is both alive and in good shape by checking the yeast viability and yeast vitality, respectively.
Rinse Your Yeast
Then, pour your harvested yeast slurry into a sanitized container, making sure you have enough room for three times the space as the amount of slurry.
Add distilled water to your slurry, leaving some room at the top, seal your container, and shake the container vigorously.
Put the container in a refrigerator and allow it to settle for at least 24 hours.
You will end up with three layers: the top is water, the middle is viable yeast, and the bottom is trub.
In one move, pour the water out of the container, pour the yeast into a sanitized container, and get rid of your trub.
That yeast alone is now good for at least 7 or 8 generations of brew.
You can propagate this yeast to last even longer, or you can start from a starter yeast that has never been fermented.
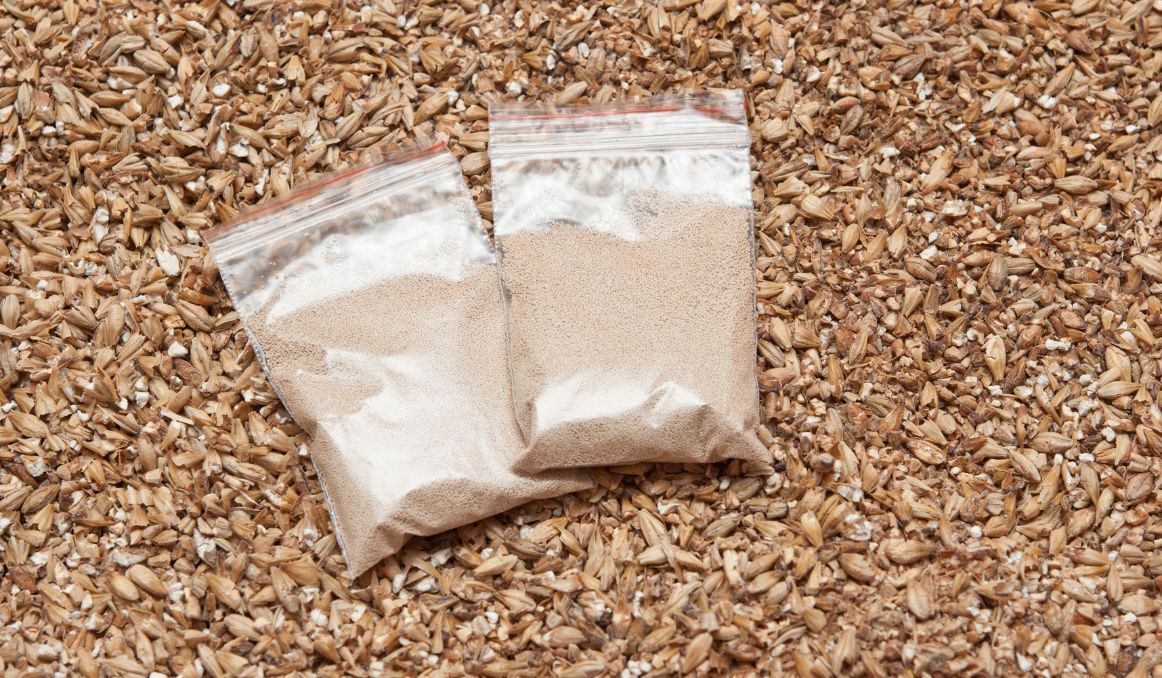
To begin propagation, you will need:
- A kitchen scale
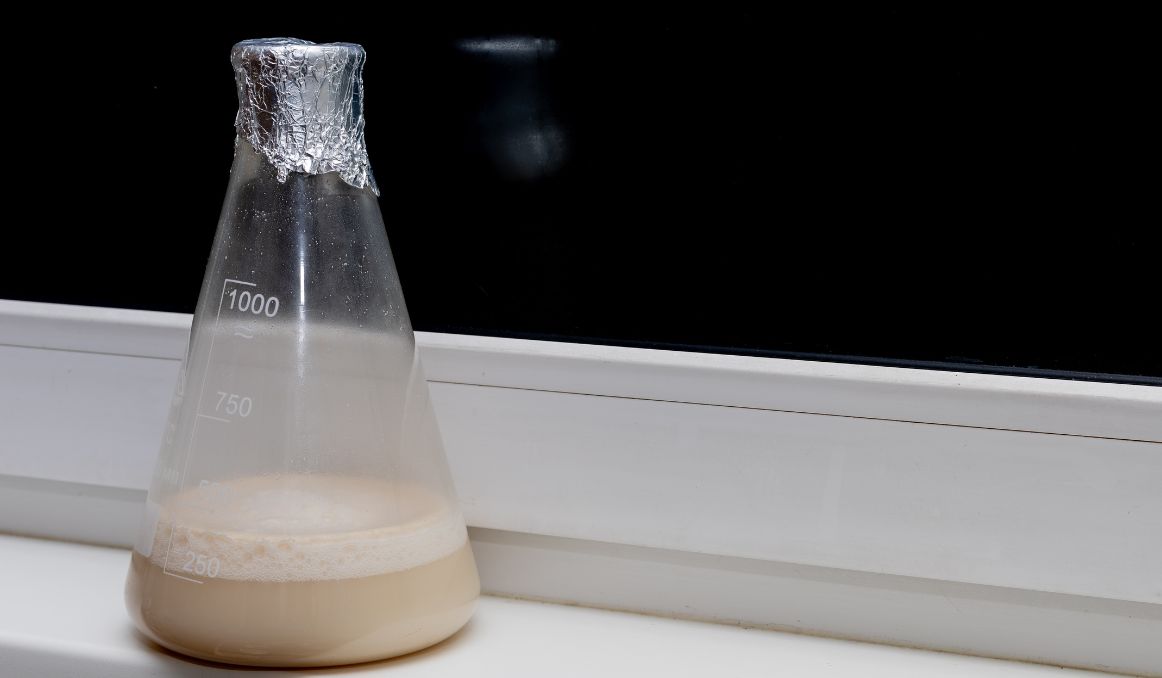
- 5 liter Erlenmeyer flask (borosilicate glass)
- Dry malt extract
- Yeast
- Canning jars and lids
- Fermcap S foam control
Yeast propagation steps:
Step 1: Clean and Sanitize Your Flask
Step 2: Weigh your dry malt extract (DME) at 100 grams per liter
Step 3: Pour DME into the flask first, then fill the flask with warm water, rinsing any residual DME down into the flask. Cover the flask opening with aluminum foil.
Step 4: Swirl your flask a bit to mix ingredients and set the flask on a stir plate with the flask stir bar inside the flask but with the aluminum foil in place. Add a drop or two of Fermcap, which will keep your boiling wort from foaming over.
Step 5: Bring your wort to a boil for a few minutes, with the foil allowing the steam to escape.
Step 6: Remove your wort from heat and chill it as quickly as possible, with your stir bar inside so you know it is sanitized. Pitch your yeast to inoculate the wort and leave it for 24 hours on the stir plate.
Ultimately, you should see a milky white appearance that means millions of healthy viable yeast cells are ready to pitch into your next batch of brew!
Cheers!
Are you still pitching fresh yeast every time? By reusing your yeast, you can save up to hundreds of thousands of dollars per year on just yeast alone!
Join the hundreds of brewers from all around the world using the Smartest Automated Yeast Cell Counter! Request a Free Demo Account today and experience firsthand how Oculyze can take your brewery to the next level!
Sources:
- https://www.schoolhousebeer.com/2021/02/15/how-to-wash-or-rinse-beer-yeast/
- https://brewhaequipment.com/blogs/how-to-brew-beer/saving-money-by-propagating-your-own-yeast-with-a-yeast-starter
Stay on top on important fermentation insights – subscribe to our monthly newsletter and receive a hand-picked selection of our most relevant articles straight to your inbox.
Never miss a beat and get real time updates with a new article each workday by subscribing our social media channels.
Instagram | Facebook | Twitter | YouTube


