How Is the Zone of Inhibition Measured?
If you’ve been working in a lab, or studying microbiology for any reason, you have likely had to ask the question, how is the zone of inhibition measured for disk diffusion tests? And you’d be in really good company. The Kirby Bauer Test has been the standard process used for disk diffusion tests for decades, but not everyone understands it or how to accurately measure the zone of inhibition. So, let’s begin at the beginning.
The Kirby Bauer Test
A version of the Kirby Bauer Test has been used in microbiology for almost two hundred years, basically as long as we have been studying yeast and bacteria.
Scientists would place bacteria onto a culture and then place various medicines onto the culture along with the bacteria to see how the two microorganisms react to each other. In the beginning, of course, the tools were rather rudimentary. Gelatin was used as a culture, glass bell jars were placed over the samples, and room for error was rampant.
Finally, in the 1950s, the World Health Organization was seeking a unified, global method to examine and work with bacteria, specifically to test antibiotics and antibiotic resistance.
Several scientists and organizations around the world submitted their methods for consideration, but the one that stood out as the winner was the one put forth by two scientists, W. Kirby and A. Bauer.
The Process
Since that time, the process has been to use agar in a Petri dish, though the agar can be cultured with other proteins or nutrients to help the bacteria survive and grow.
The lab technician will dilute the bacterial sample by a factor of 10 and then dilute it at least once more by a factor of 10 to get a sample scientists can examine with the naked eye.
From that diluted sample then the lab tech will take a culture using a cotton swab and swipe the swab over the agar in a tight zigzagging motion from edge to edge of the Petri dish.
The instruction is then to turn the plate 90 degrees and repeat this step to ensure the entire agar is covered with the bacterial sample.
Then, the Petri dish should be incubated according to the bacteria requirements. Be sure the lid is in place and the dish is turned upside down.
After a period of time no less than 18 hours and usually no more than 36 hours, the Petri dish can be examined to count CFUs, or colony forming units.
Struggling to count CFUs? Get our complete guide on How to Count Colonies on Agar Plates!
At this point, you can also describe the CFUs for various characteristics and log this information for future reflection.
Finally, the lab tech can place antibiotic disks onto the established culture, ideally using an automated disk release that places three disks precisely on the agar at the same time.
Then, wait another 18 hours to 36 hours to see how effective the antibiotics have been.
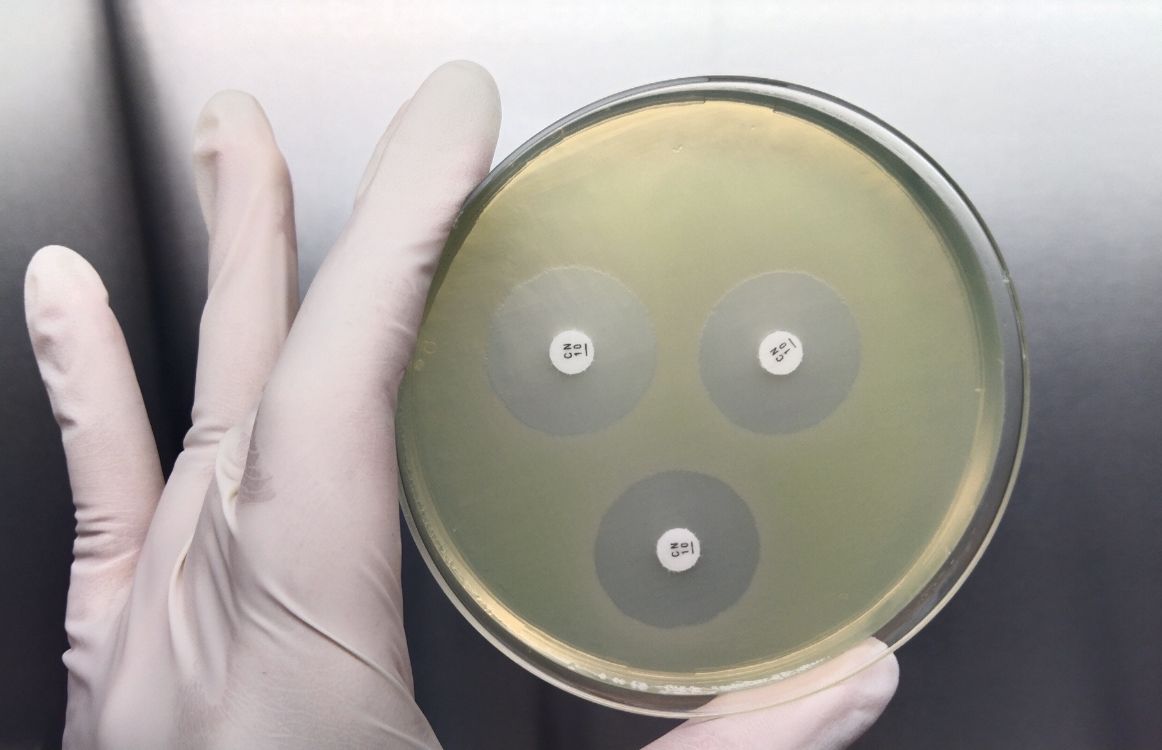
The Zone of Inhibition
When you check the Petri dish after you have placed your disks, you will be looking for the zone of inhibition. The zone of inhibition is the space around the disk that is free of bacteria. It typically spreads out from the disk in a uniform circle. Beyond that disk, bacteria are still growing and thriving.
Thus, measuring the inhibition zone, or the zone of inhibition will tell you how effective a particular antibiotic is.
How Is the Inhibition Zone Measured?
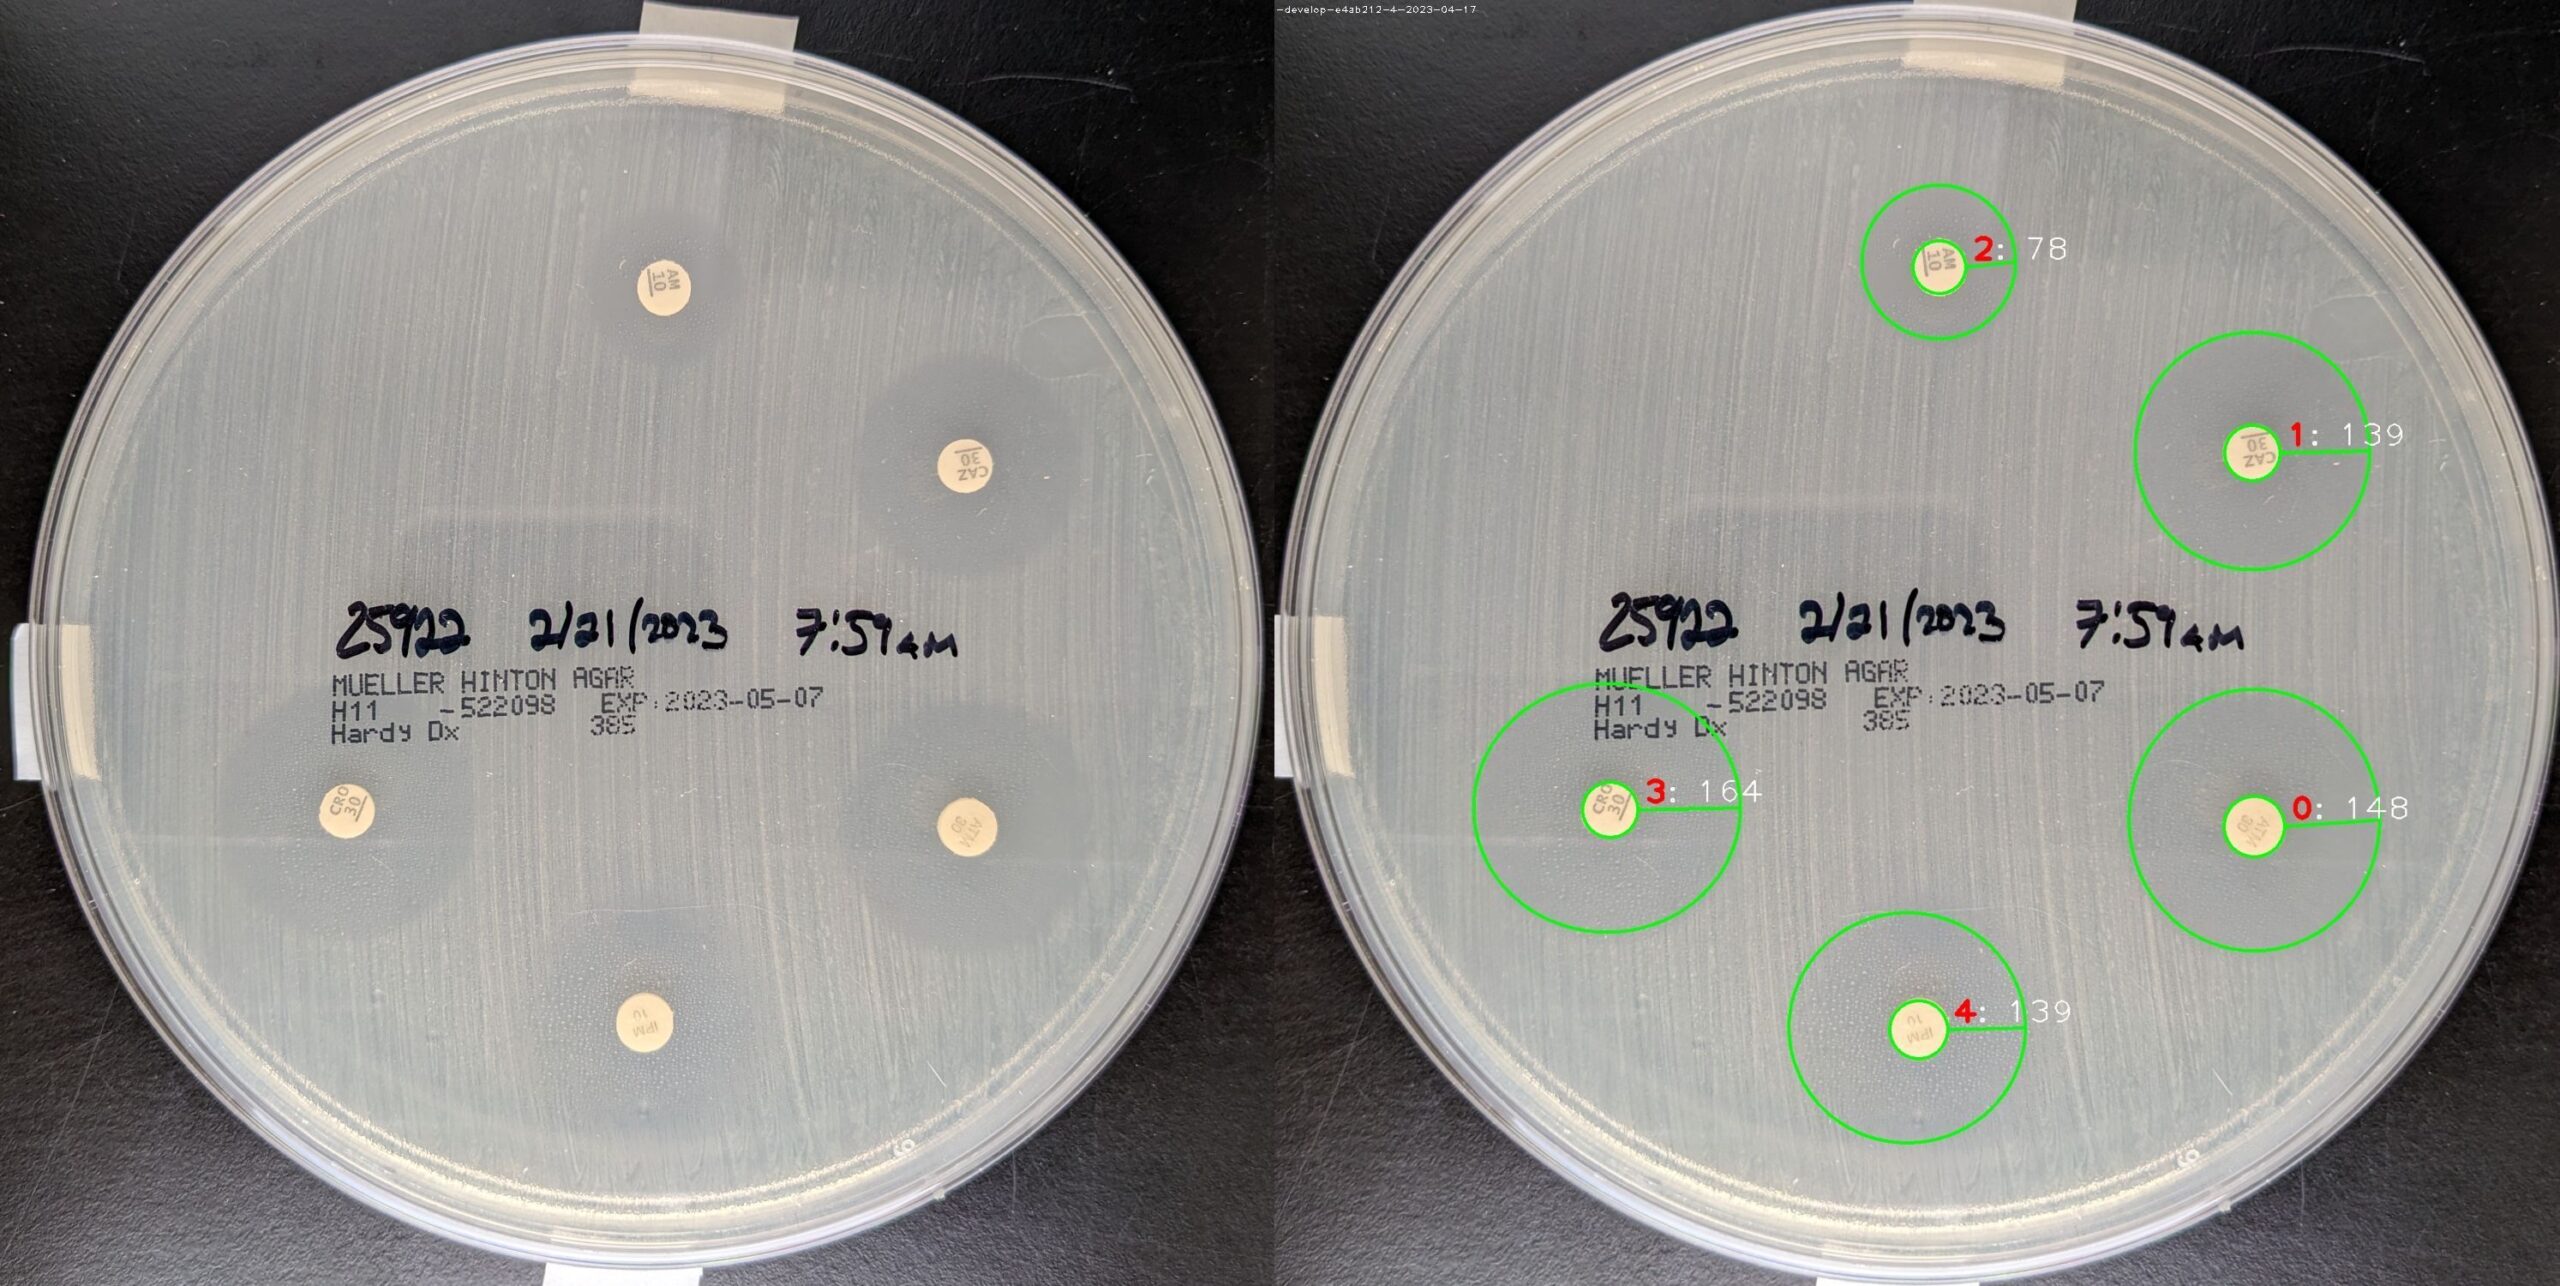
To measure the zone of inhibition, you’ll examine the Petri dish from the bottom. Using a metric ruler, you’ll measure in millimeters the distance from one edge of the zone of inhibition to the other, directly across the middle, at the widest diameter.
Oculyze Makes It Easy
Of course, there will always be problems with this method. You might not know the exact middle of the zone of inhibition. You may struggle to figure out which is the widest section. Or, you could have trouble seeing the zone of inhibition in poor lighting.
Other errors could include a zone of inhibition that is pressed up against the edge of the Petri dish.
The solution to all of these errors, and more, is to have artificial intelligence do the work for you.
You could simply upload an image of the bottom of the petri dish to Oculyze’s Automated Disk Diffusion analyzer and get an accurate measurement of each zone of inhibition quickly. It takes the guesswork out of the entire process.
The joy of AI in technology is that we can save time, money, and energy, better utilized in other areas of our business, by allowing well-trained machines to do our mundane tasks faster and better than we ever could.
You can test the Oculyze Disk Diffusion Analyzer App for free here.
With our Image Analysis Platform, you can save hundreds of hours of work that would have gone into manual labor. Image analysis automation provides you with accurate results and secure data management in less time, so you can save your resources for something that brings more value to your business.
Let artificial intelligence do the hard work for you. Start saving time and costs now! Want to know more? Contact us and we’ll be happy to help!


