Calibration of the microscope with the Oculyze yeast cell counting app
In order to be able to correctly calculate the concentration, the camera must be calibrated for the used microscope and magnification. If there is no change in the magnification and the same microscope is used, this only has to be done the first time.
Otherwise, the calibration must be repeated because the saved calibration factor is no longer correct.
If the “External Camera” setting is turned on in the app settings the calibration can then be started via “Calibrate” in the start screen.
Here is a video showing how the calibration should be done:
And here are some additional details:
Position the counting chamber without any sample and cover slip in the microscope. Make sure that the center of the counting grid with its smallest squares is shown sharply in the picture.
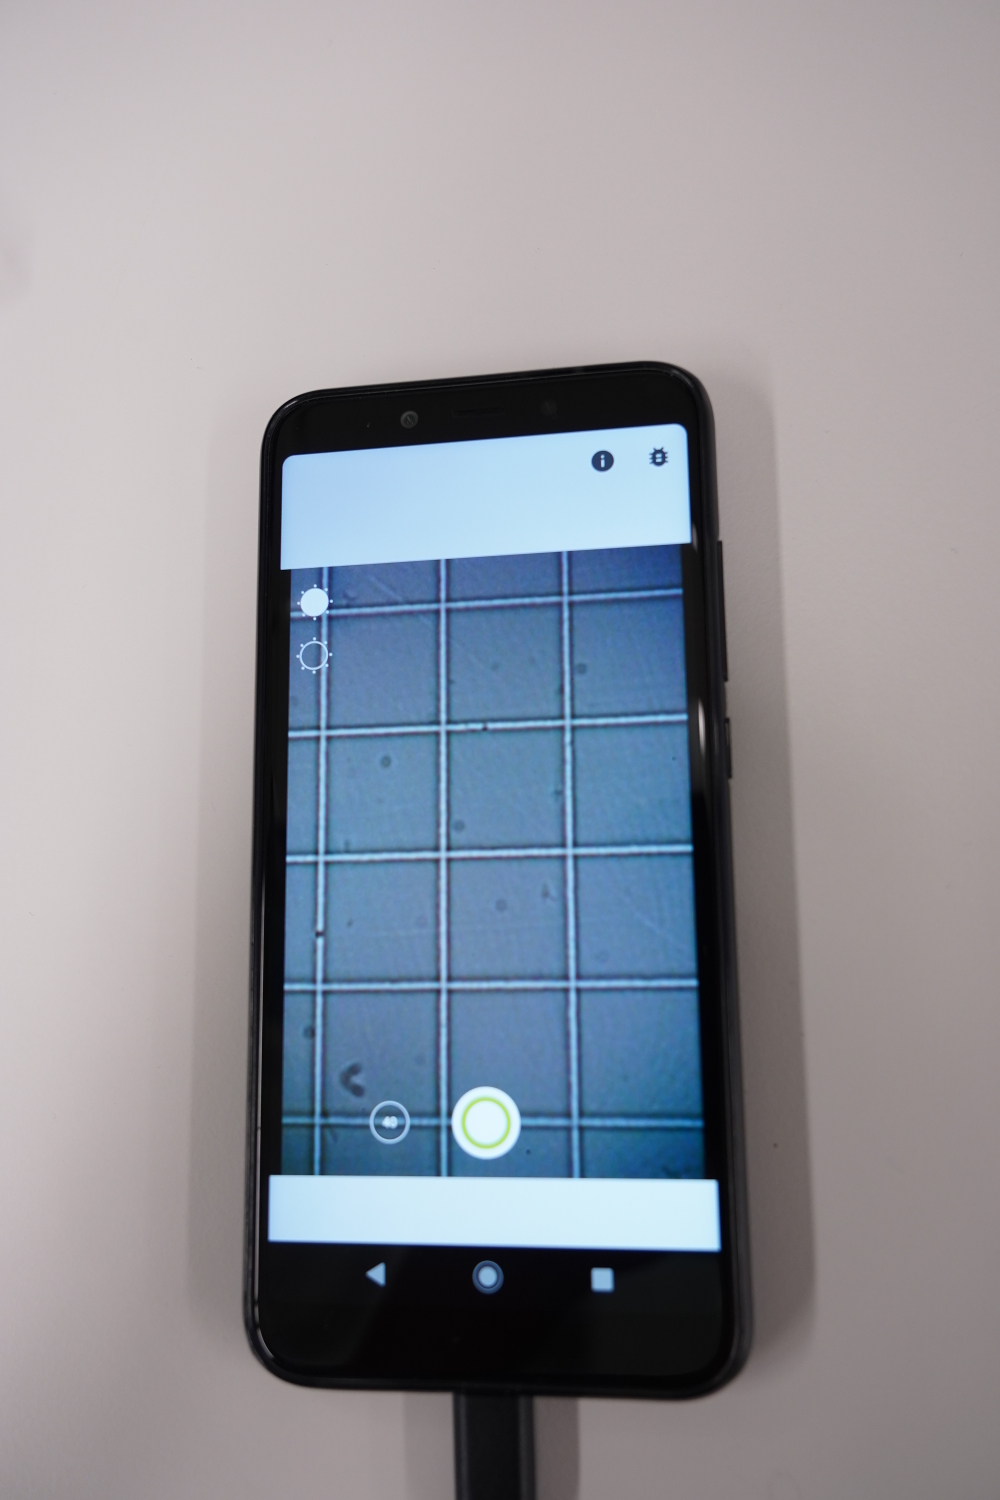
If the image appears too dark or too bright, the brightness can be adjusted using the two sun symbols in the upper left corner. Alternatively, the intensity of the illumination can be readjusted on the microscope.
Now press the record button and wait until a small square is recognized and overlaid by a white square. Only press “Keep” if a correct square has been recognized. This is one of the squares in the middle of the counting grid, which corresponds to the size specified in the chamber data.
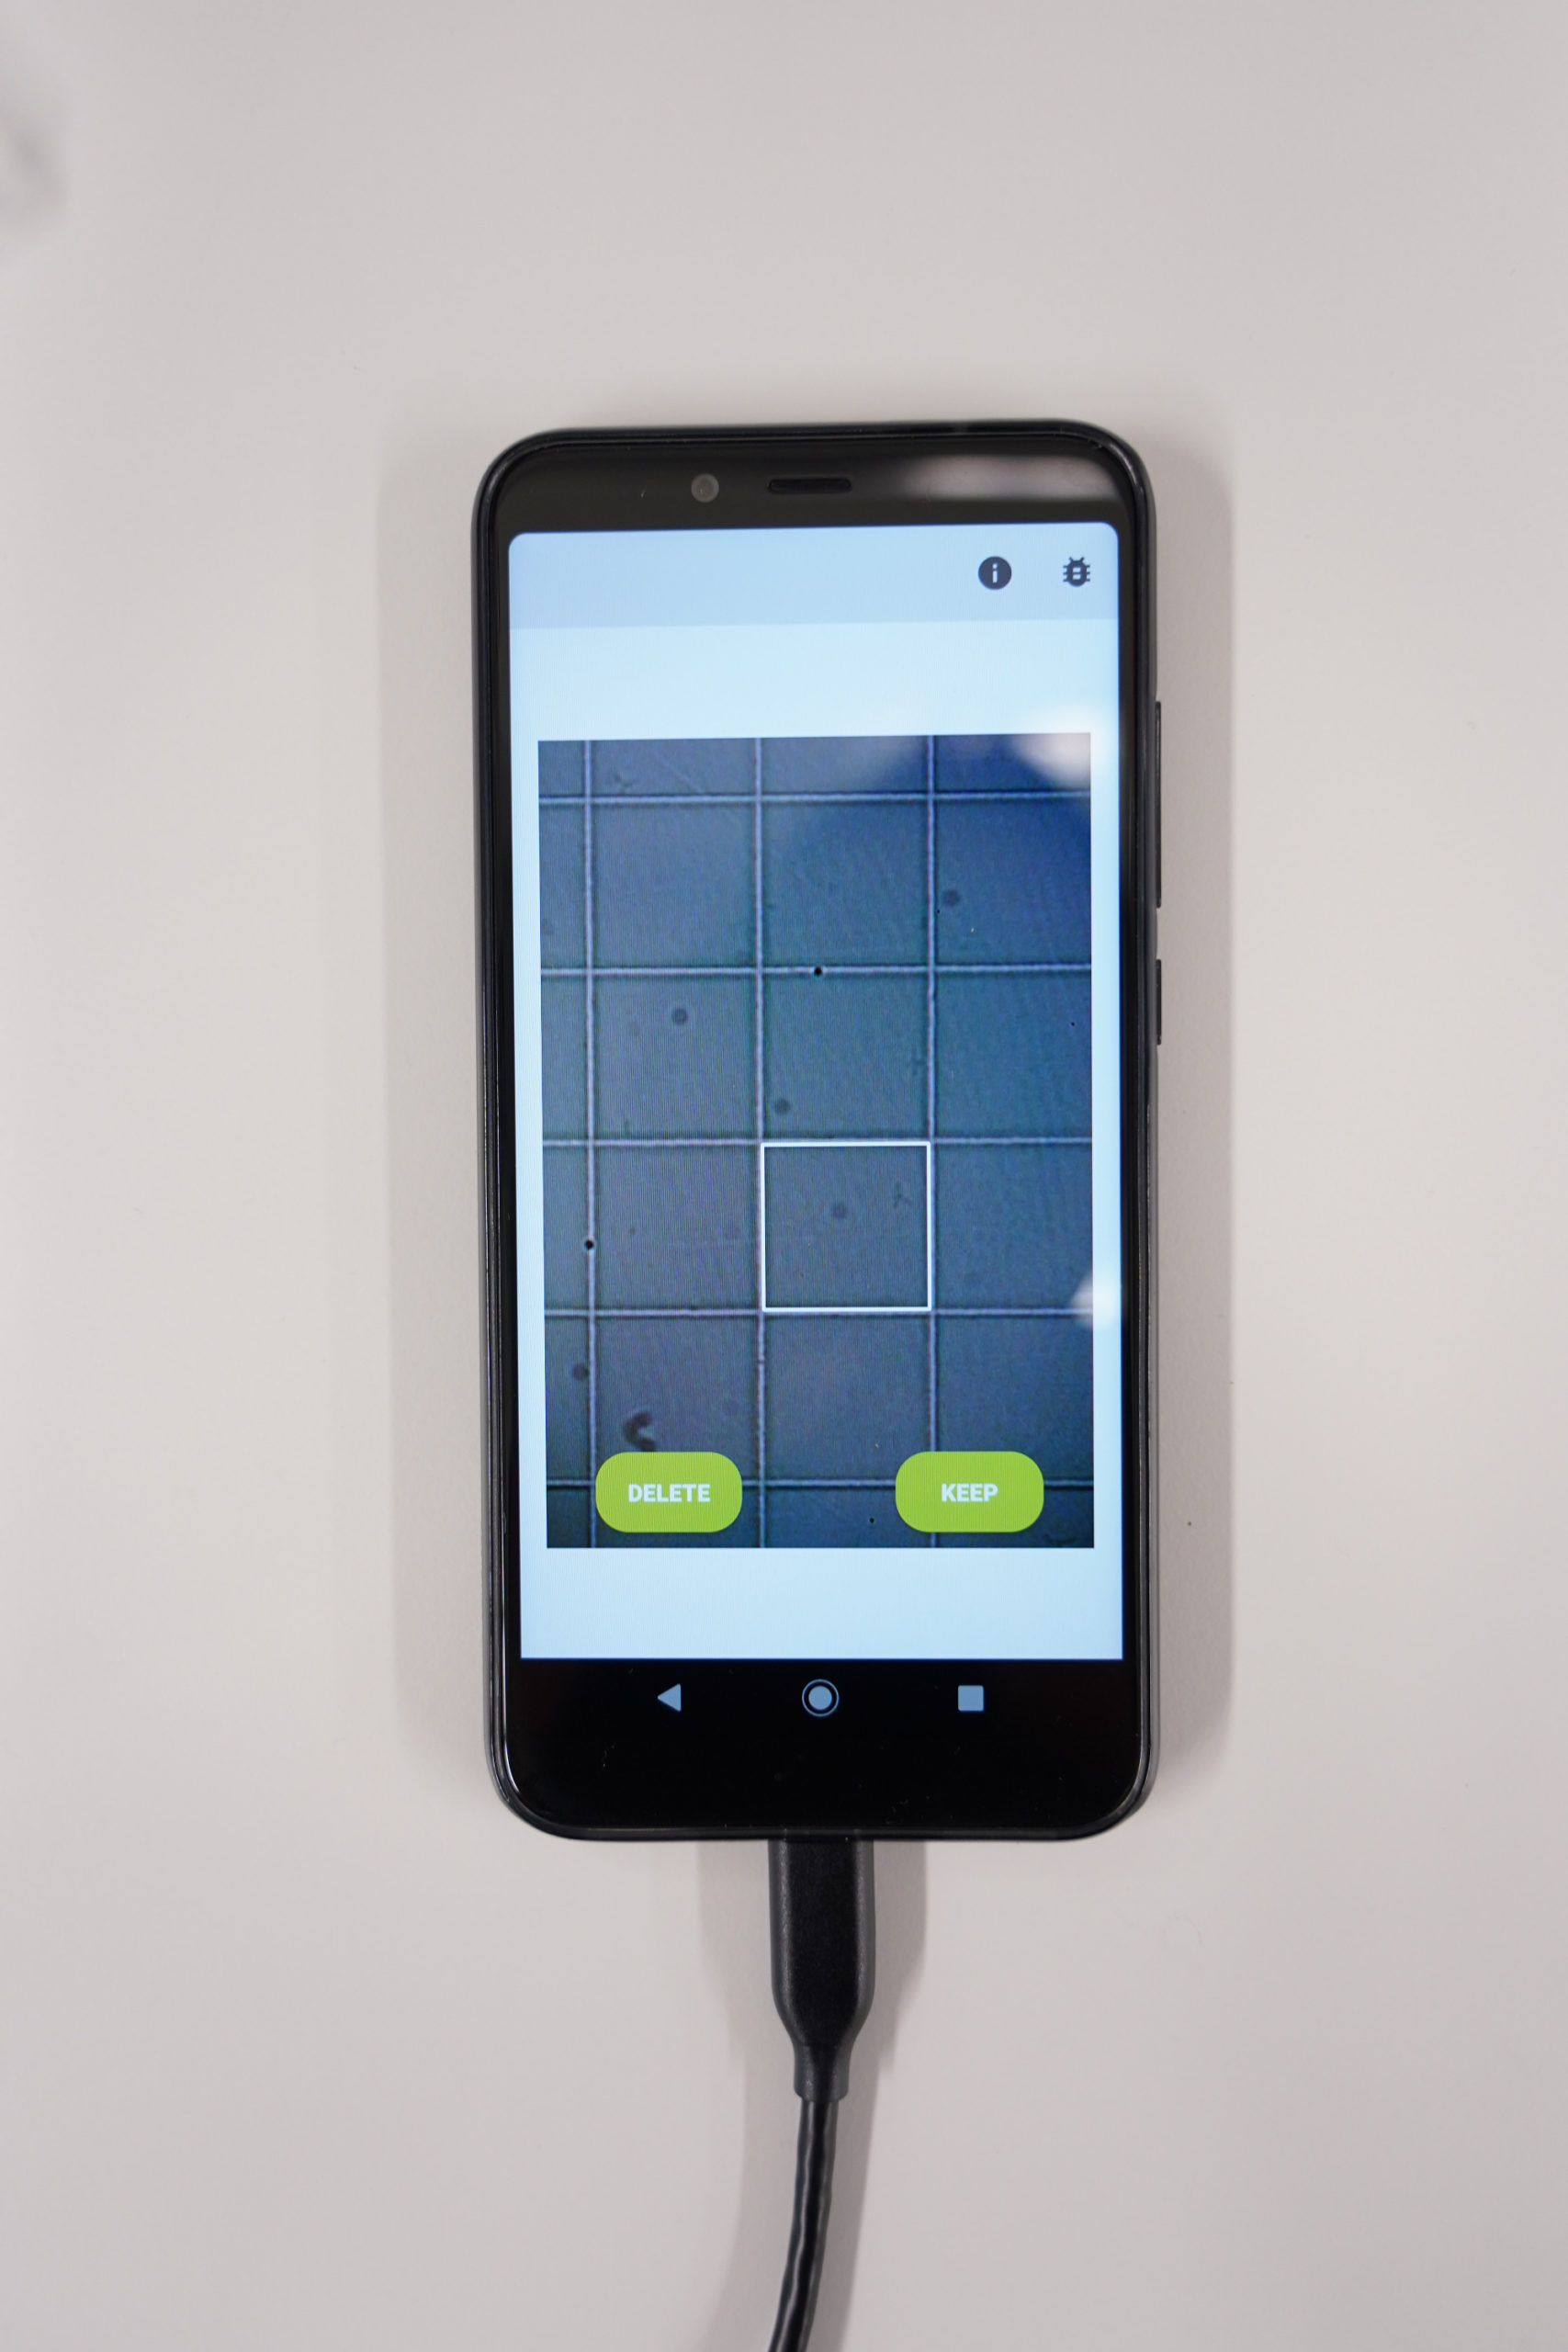
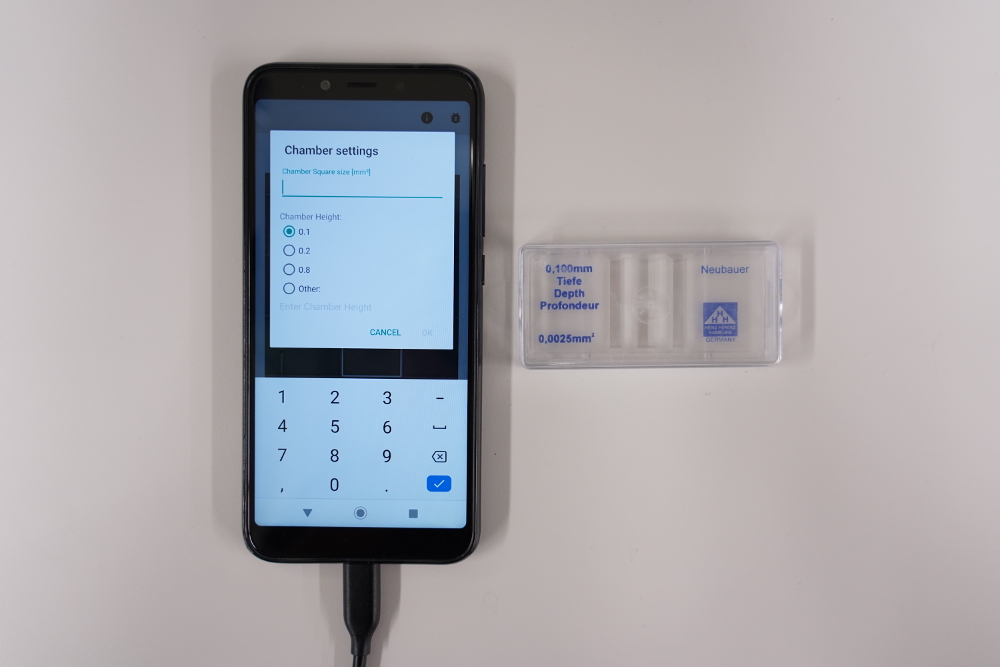
If a different square or no square is recognized, repeat the process. If necessary, realign the chamber and/or clean it. As soon as the detection is successful, you will be asked to enter the chamber height and the square size. Enter this data, which is usually also noted directly on the chamber, and press OK to complete the calibration.
Now the sample measurement can begin.